Guide | MobiPOS > Settings > Stock File > Menu Language
Menu Language
Menu language allows you to translate your menu into multiple languages.
This can be useful if you would like to support alternate language printing in bill, menu display in the POS, online ordering or kiosk.
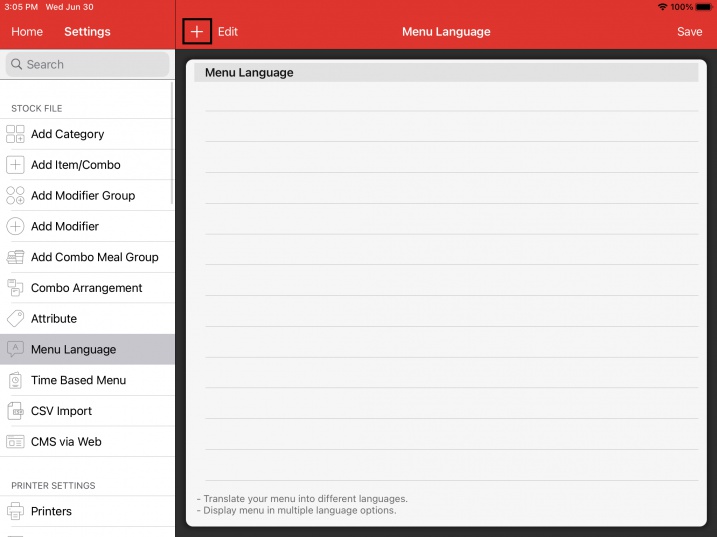
Start by adding your preferred language name.
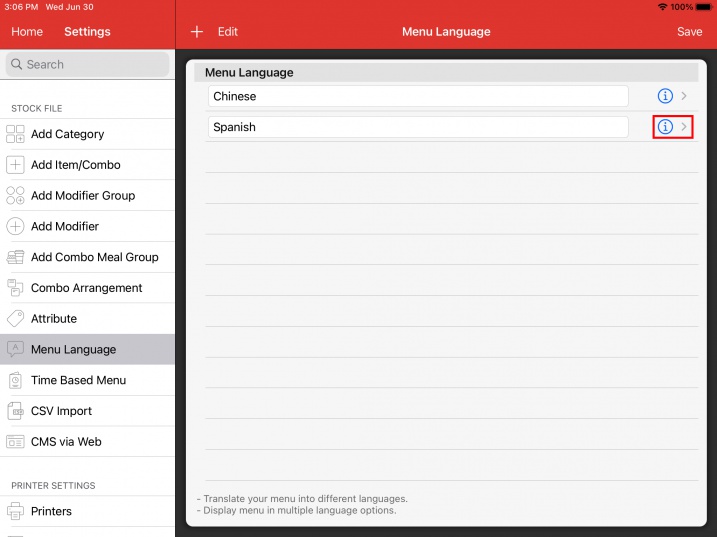
In this example we have added Chinese and Spanish as the example.
To start translating, click on the Info button located on the right.
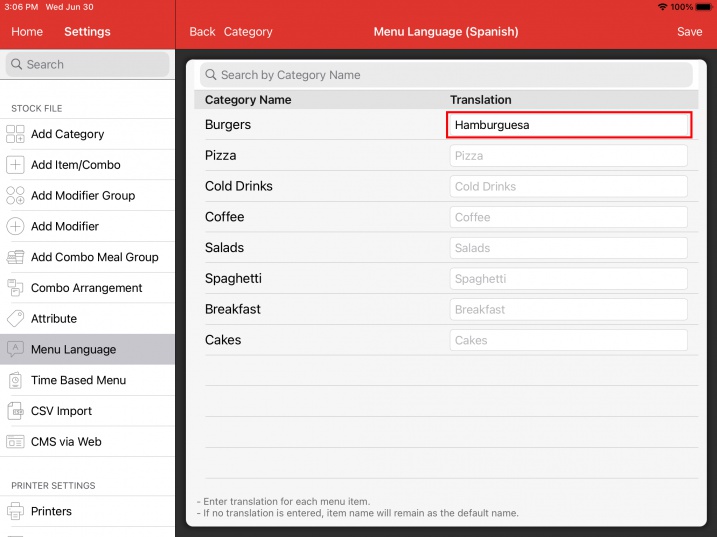
You will be presented with all the categories that you have created in the system.
Enter the translation on the right for the selected language.
In this example, "Hamburguesa" will be the translation of "Burgers" in Spanish.
To translate item, modifier group, modifier or combo meal group name, click on the Category button located on the top as shown in the screenshot below.
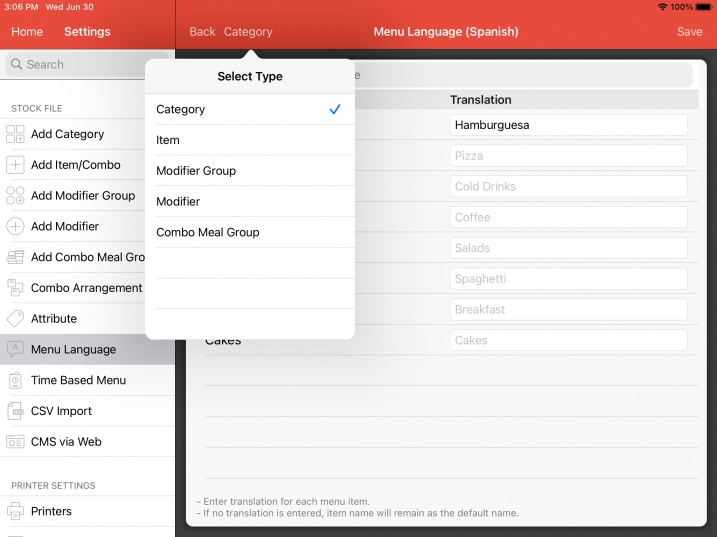
Click on Item and you will be presented with all items that you have created.
Proceed to translate as shown in the screenshot below.
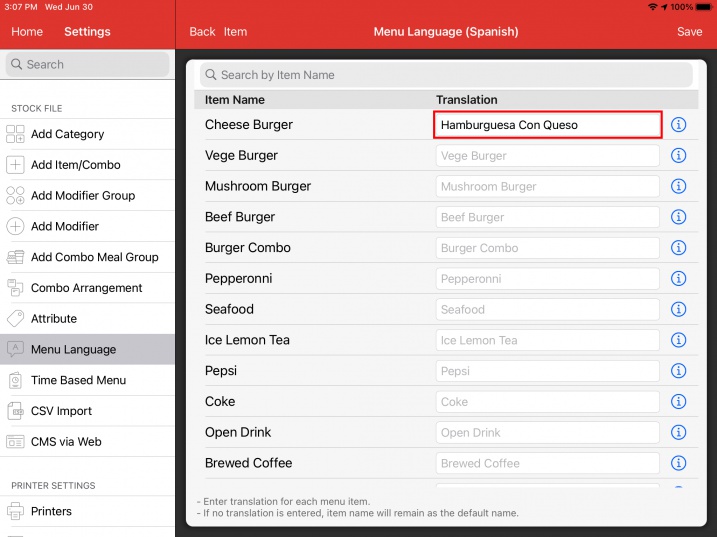
Proceed to Save upon all changes.
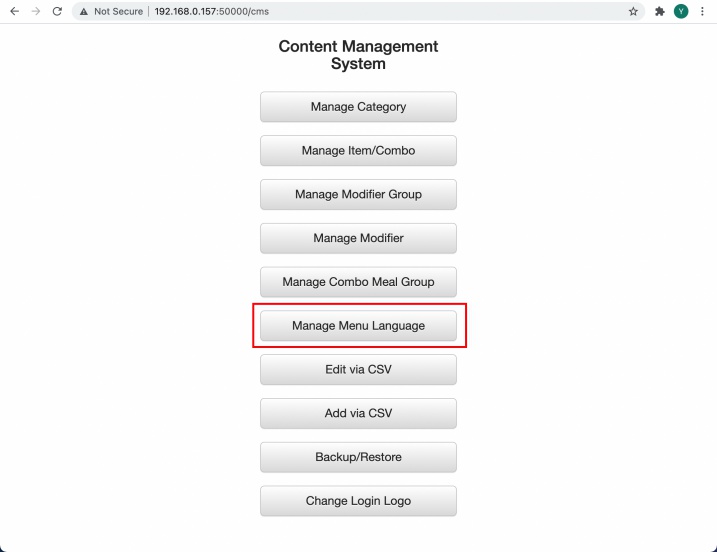
Alternatively, you can change all your menu language using csv import.
Proceed to CMS via Web, look for Manage Menu Language and follow the instructions shown in there.
Changing App's Menu Language
By default, all menu will display according to the primary name created.
To change that, go to Settings -> General -> Menu Language
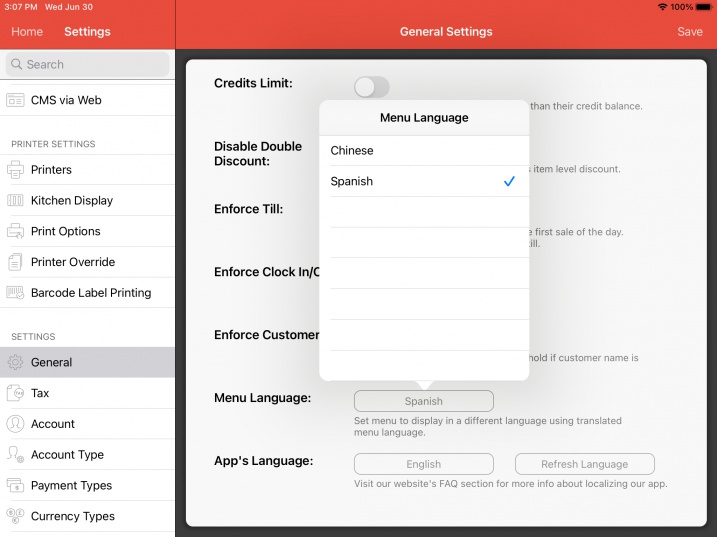
Select the preferred menu language.
Click on the selected language again if you wish to restore to default.
Upon saving, menu will be displayed according to the translation done in Menu Language (Spanish).
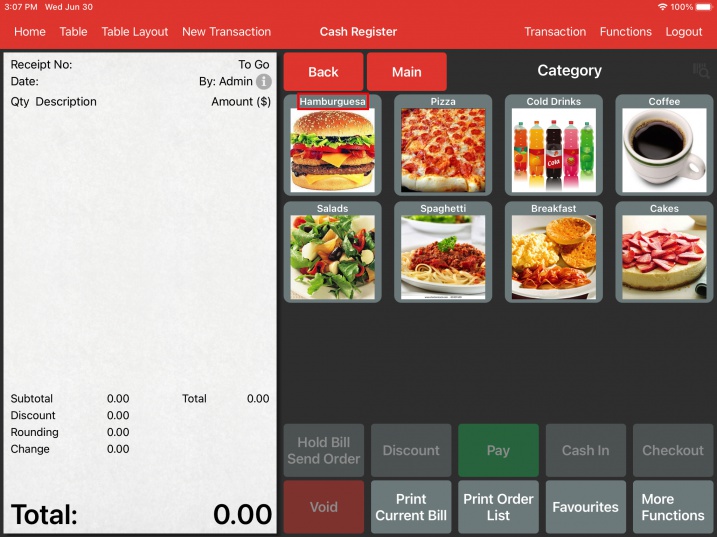
As highlighted, the "Burger" category is now displayed as "Hamburguesa".
For menu that is not translated, the default name will still be used.
Changing Account's Menu Language
Menu language can be configured to display according to login.
To do so, proceed to Settings -> Account.
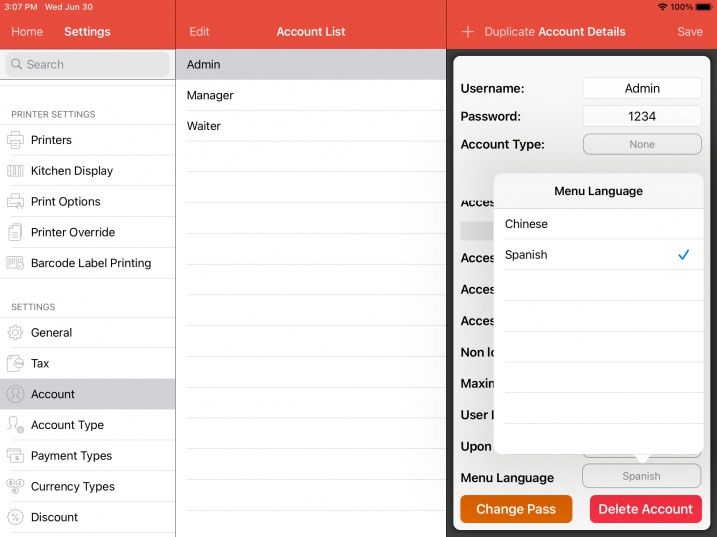
Select the language for the account.
Menu language will be displayed according to account before app's configured language.
Changing Receipt's Item Language
The default receipt's item language can be configured to an alternate language.
To do so, proceed to Settings -> Print Option -> Bill.
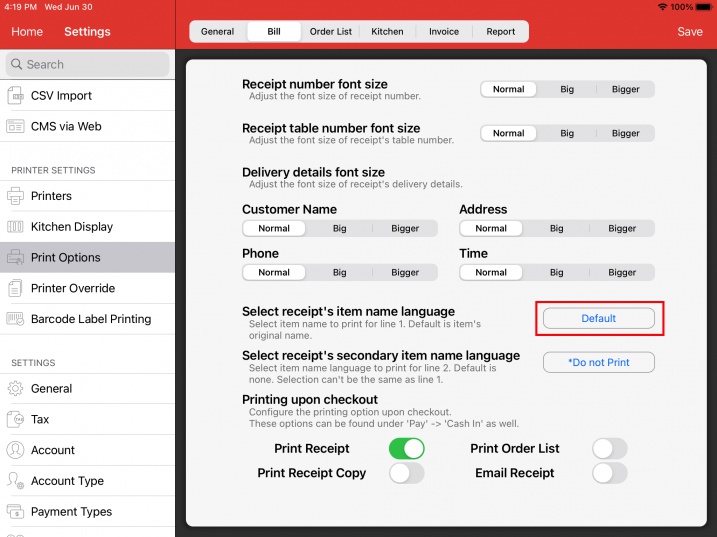
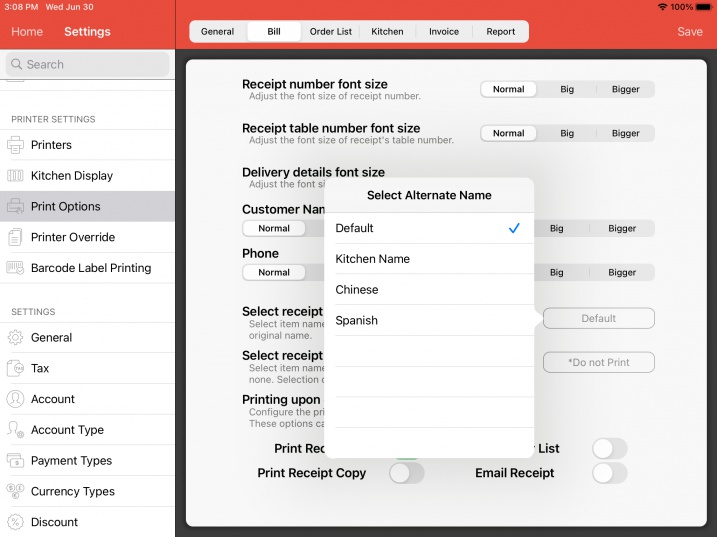
Here you can change the default receipt item's name language or you can choose to print an additional line of item name in different language.
