Guide | MobiPOS > CloudSync > Inventory Management > CloudSync Inventory Management
CloudSync Inventory Management
Track Inventory must be turned on to manage inventory by going to Stocks -> Item in the manage inventory section.
You may manage Inventory of menu item in this page.
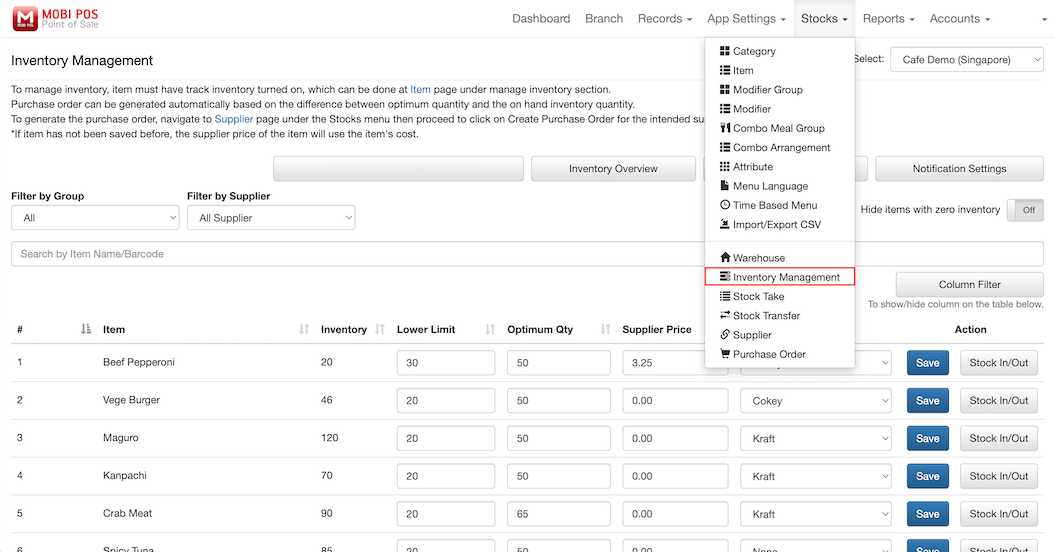
To use the Inventory Management feature, log in to MobiPOS CloudSync,
then go to Stocks -> Inventory Management..
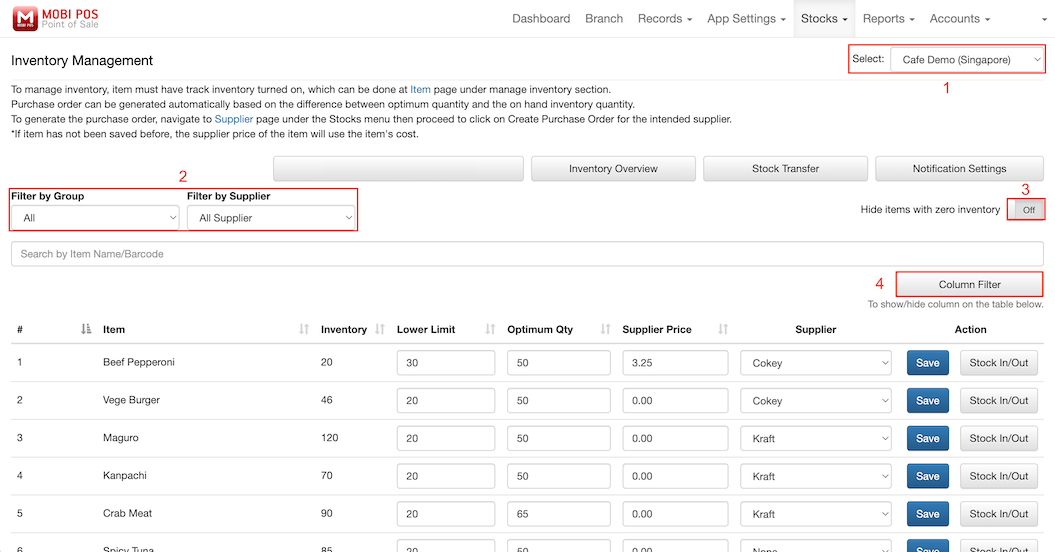
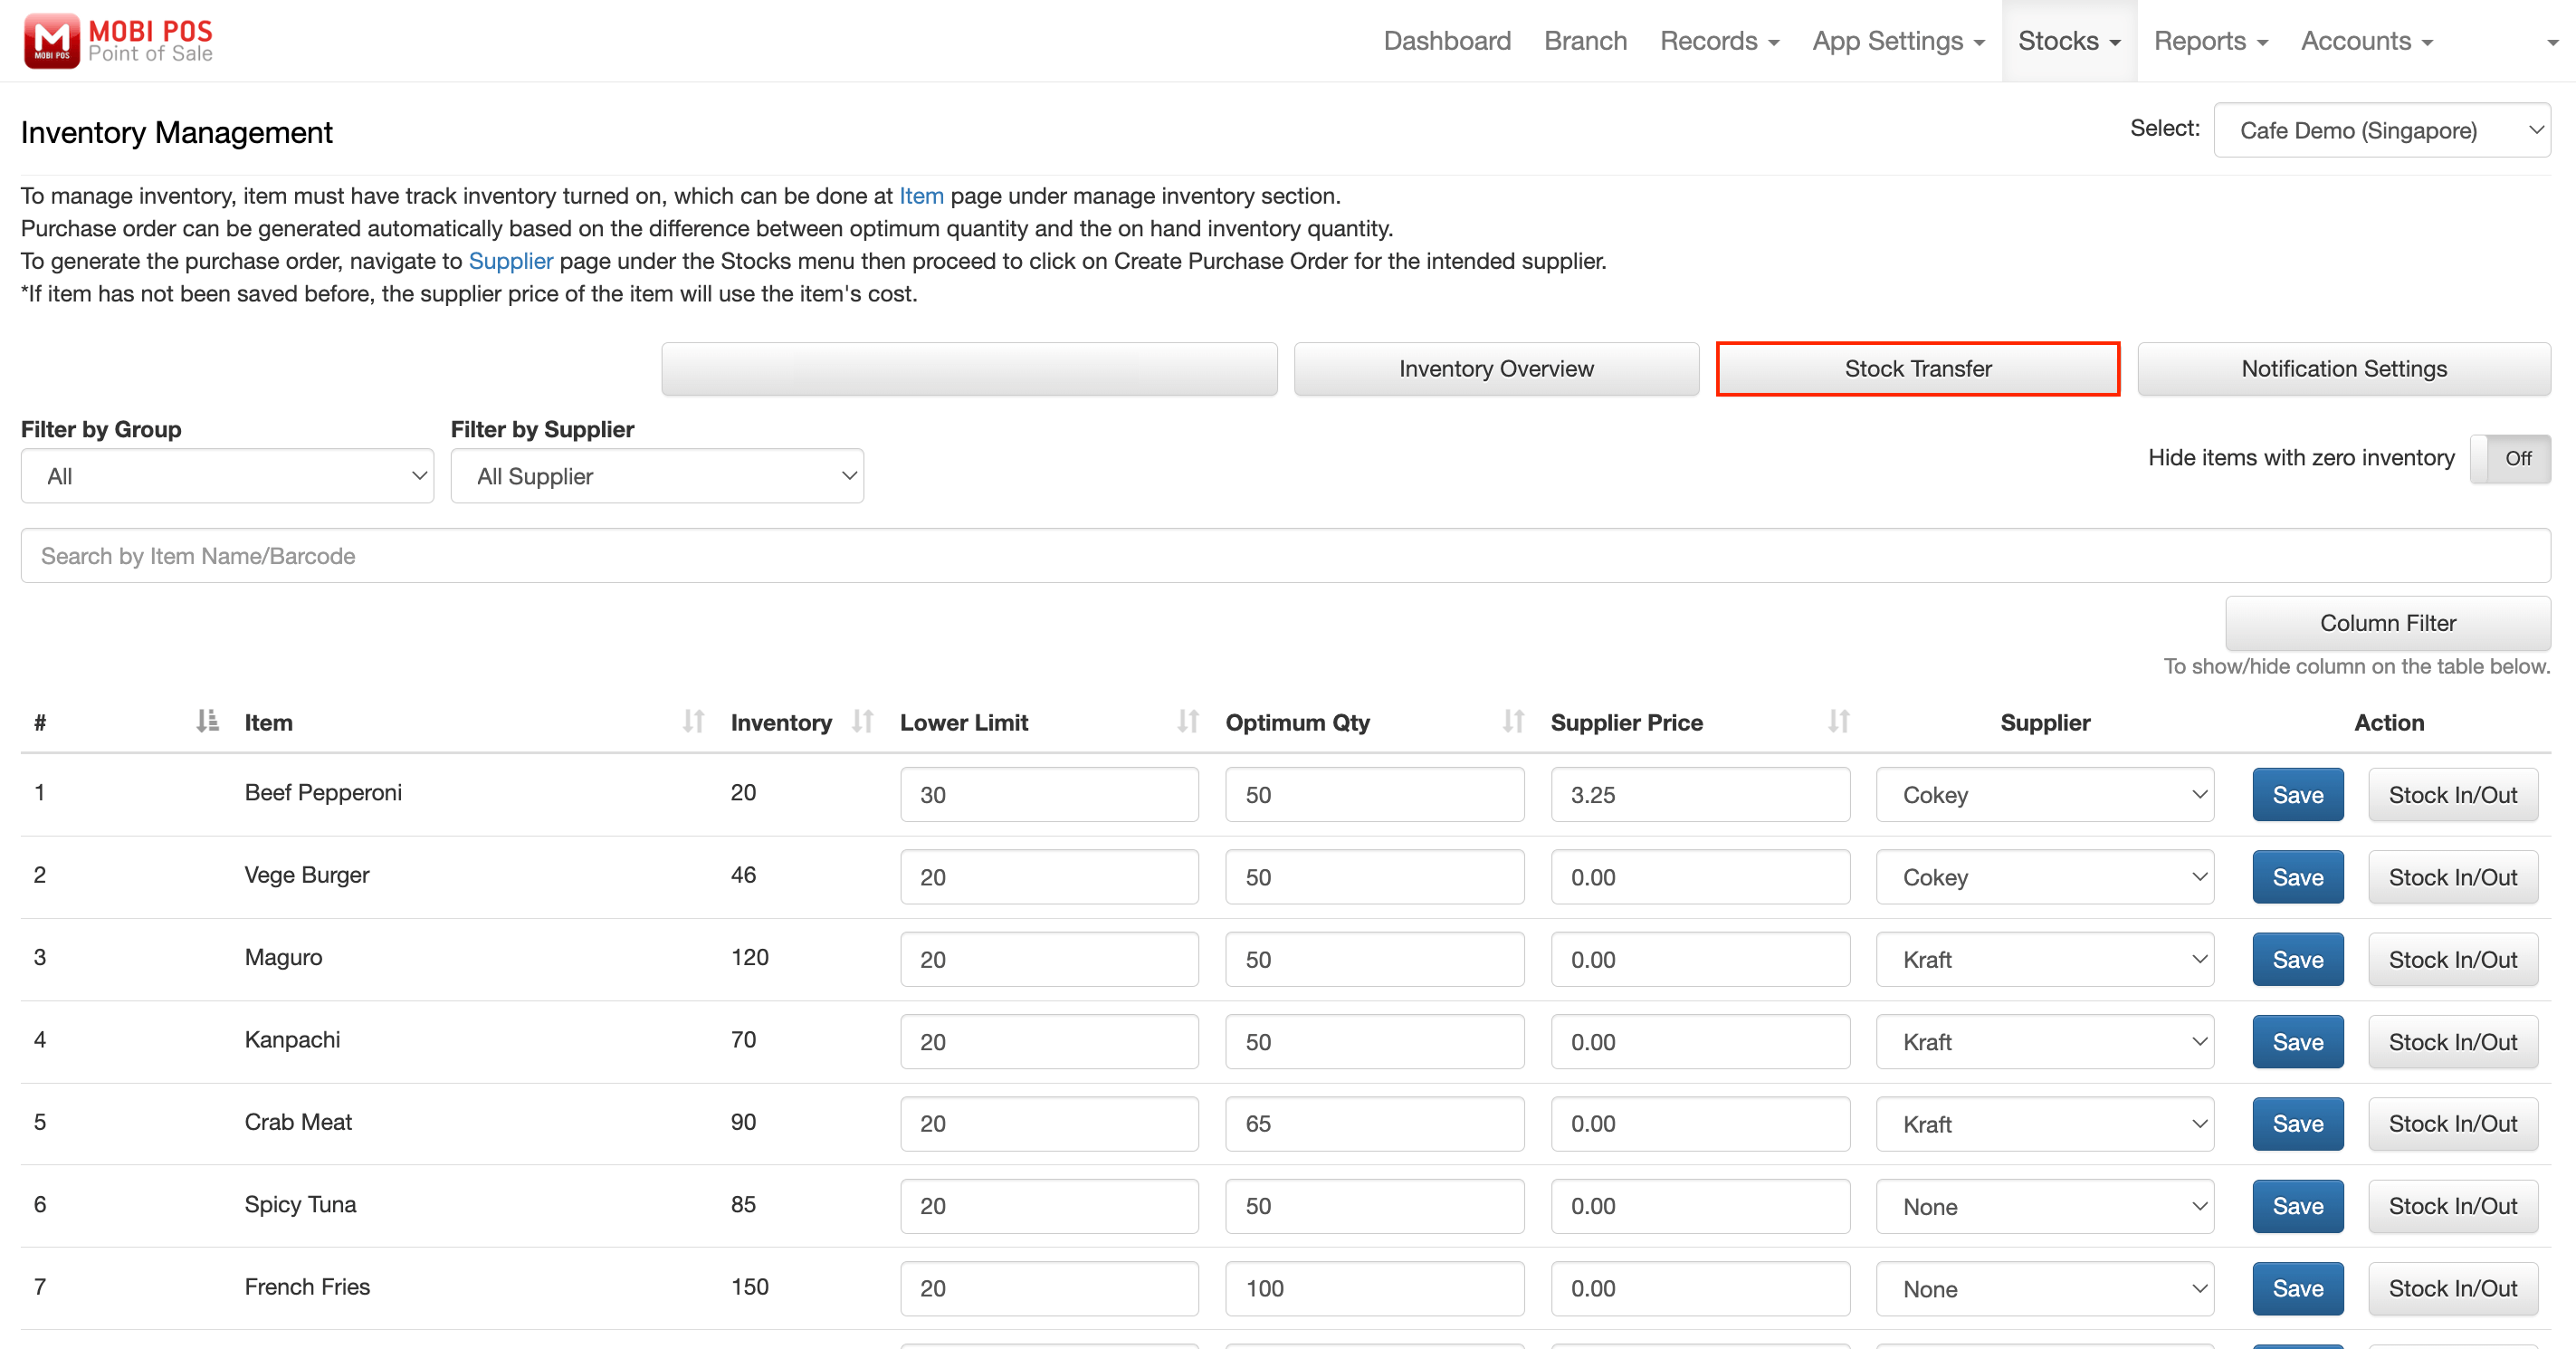
Each items shows their current Inventory quantity.
You may set your own Lower Limit and Optimum Qty for each specified items.
You may refer to your own supplier on item's Supplier Price and Supplier name.
Make sure to click Save to apply your changes.
You may further filter inventories:
1: Select your outlet or warehouse.
2: Filter the items based on categories and filter suppliers.
3: Hide items with only zero and below inventory quantity.
4: Hide specific columns from the table if necessary.
Configuring these information helps in automating the creation of a purchase order.
During the creation of the purchase order, with the information provided, the system is able to calculate the stocks amount to be replenished automatically.
For example, if the item's optimum quantity is set to be 150, the lower limit is set to be 20 and the Current Inventory quantity is 15.
The quantity to order will automatically be 135 in the purchase order creation page to match the Optimum Qty of the item.
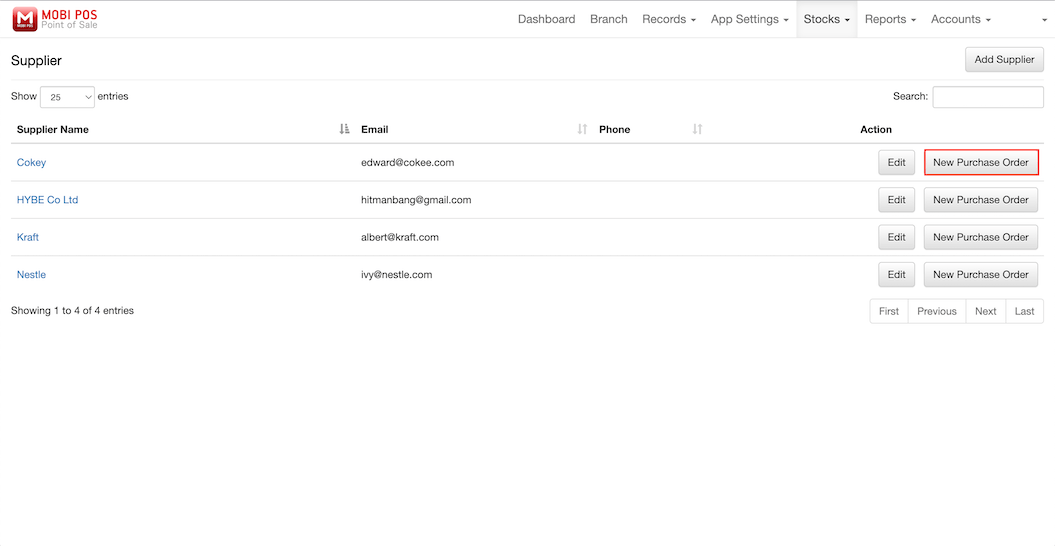
To create a purchase order based on the supplier, go under Stocks -> Supplier
then New Purchase Order under "Action" column.
All items that are below the lower limit will be populated in this purchase order.
Quantity to order will be calculated and shown automatically according to the information inserted at the Inventory
Management page.
This reduces the hassle to search for each product item and calculate the order quantity to be replenished.
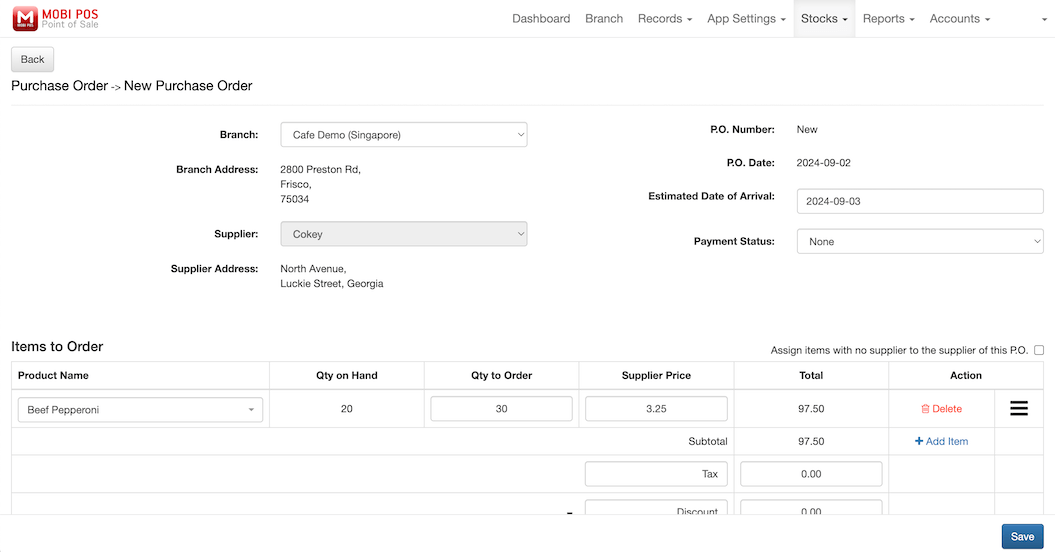
For more information about the purchase order, do refer to our
Purchase Order guide.
Back in Inventory Management, users can perform manual Stock In/Out.
Under the Action section, there is a Stock In/Out button.
Upon clicking it, you will be presented with a page similar to iPad stock management.

Users can adjust the Inventory quantity under this tab.
Key in the adjustment quantity, choose the adjustment type, then click Adjust.
You may edit the Cost of the item and add Remarks.
Stock In will add the adjustment count on top of the current on-hand quantity.
Stock Out reduces the current on-hand quantity based on the adjustment. A negative symbol is not required.
Wastage will reduce Current Inventory quantity, you may use this when the item could not be used or sold.
Replace Count allows you to key in any amount that you want to overwrite.
For example, if the Current Inventory quantity is 50, you put a Replace Count of 150, the adjustment will automatically be a stock-in of 100.
* Do note that performing stock in out in the cloud will reflect the changes in the iPad only after the iPad syncs with cloud.
* Inventory on hand might not be as accurate if the outlet is currently operating.
Inventory Overview
Inventory Overview page shows a list of items in different branches and warehouse.
Each branch shows the inventory quantity of each items and the total amount of inventory in each branch will be shown at the "Total" column.
To see your inventory for all outlets, you may click on Inventory Overview.
✖ - Track inventory is off.
Number in red - Inventory is below lower limit.
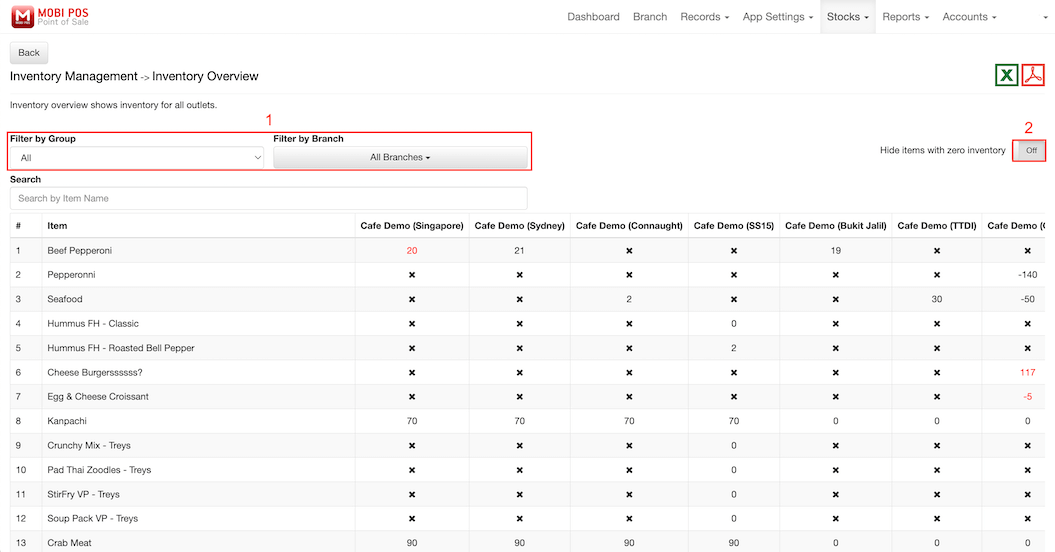
1: You may filter your items by group and specified branch by clicking on the drop down boxes.
2: When turned on, all items with only zero inventory quantity will not be displayed in the table. Negative inventory will still be shown.
Stock Transfer
You may use Stock Transfer to transfer inventory between different branches and warehouses.
To navigate to Stock Transfer, you click on the button shown below or go to Stocks -> Stock Transfer.
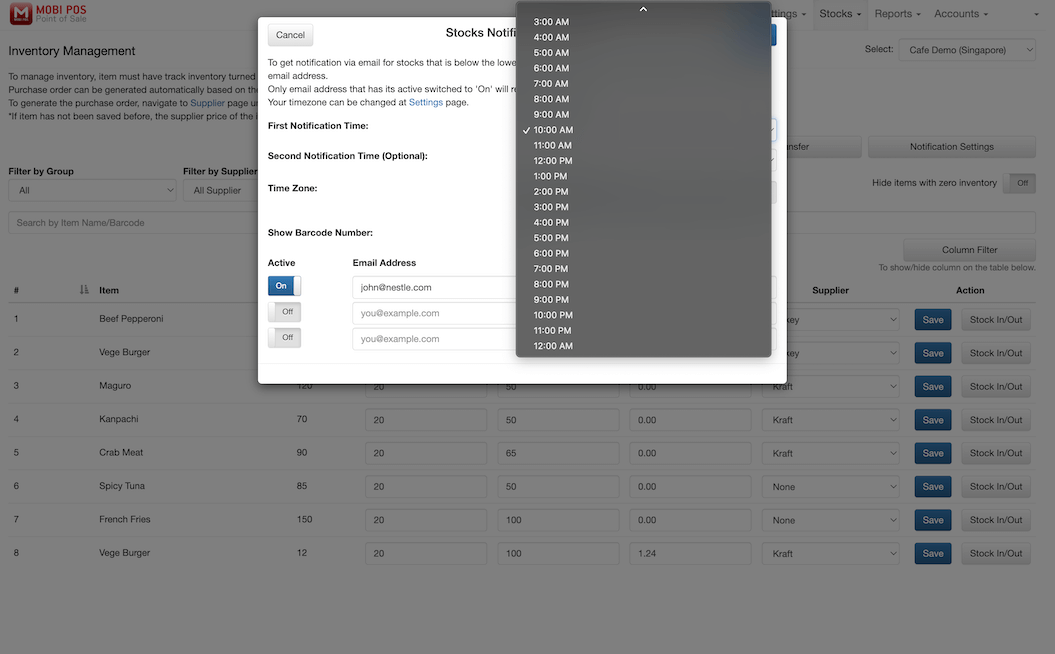
Notification Settings
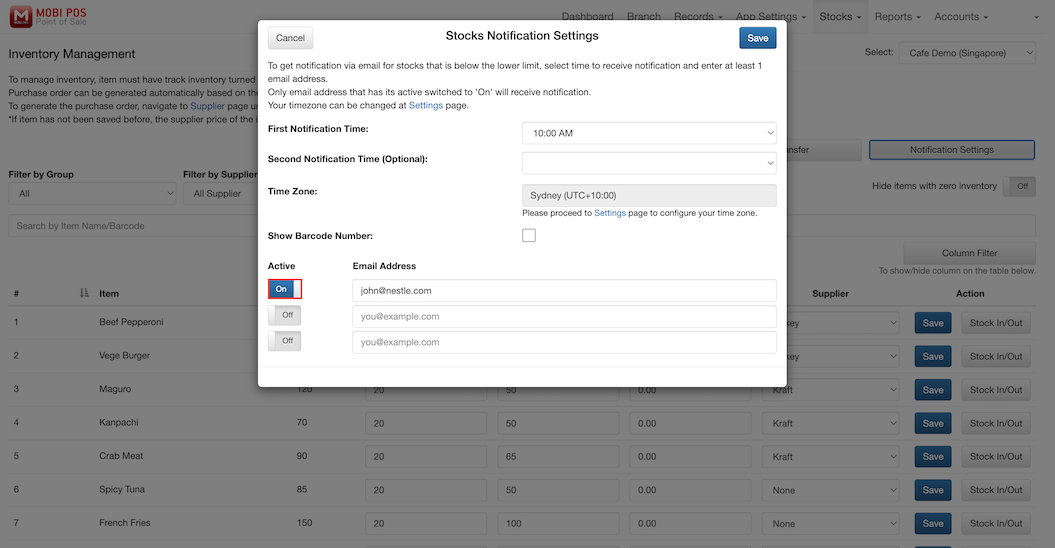
You will get notifications of inventory stocks that are below the lower limit that was set for the item.
Set your own Email Address to receive notification.
Note: Email Address with the Active button toggled "On" will only receive notification.
Select your first notification time from the drop down box.
You may select a second notification time if necessary.
All configured time are set according to your timezone configured in Settings.
