Guide | MobiPOS > Terminal Setup > Connect using Hotspot
Connect using Hotspot
This guide will explain on how to connect to your Personal Hotspot to substitute router and modem functionalities. We will be connecting iPad A and iPad B to your device's personal hotspot.
Step 1
In this scenario, we will be using an iPhone to transmit personal hotspot to iPad A and iPad B.
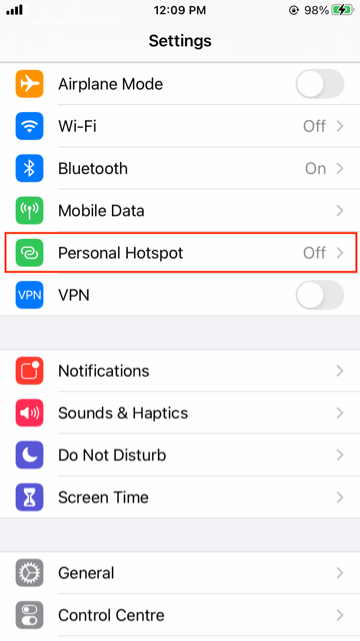
Go to settings in your iPhone, then select personal hotspot.
Step 2
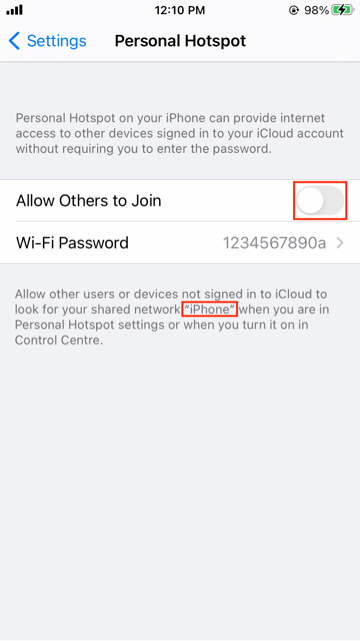
Your network name will appear in the highlighted text below.
In this scenario, your network name is “iPhone”.
Keep in mind the network name as you will be connecting to this network from iPad A and iPad B later on.
Click to turn on “Allow Others to Join” as highlighted below.
Step 3
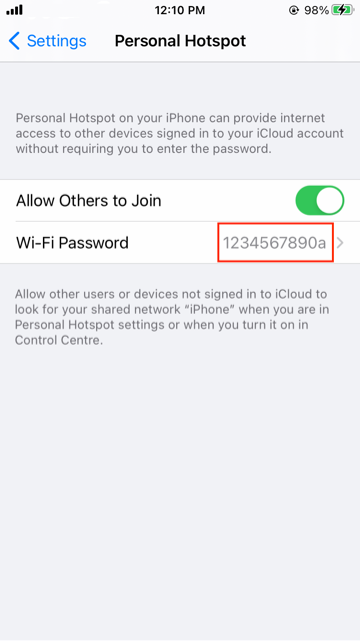
Take note of the Wi-Fi password as you will need to input it into iPad A and iPad B later on.
In this scenario, the password is “1234567890a”.
Step 4
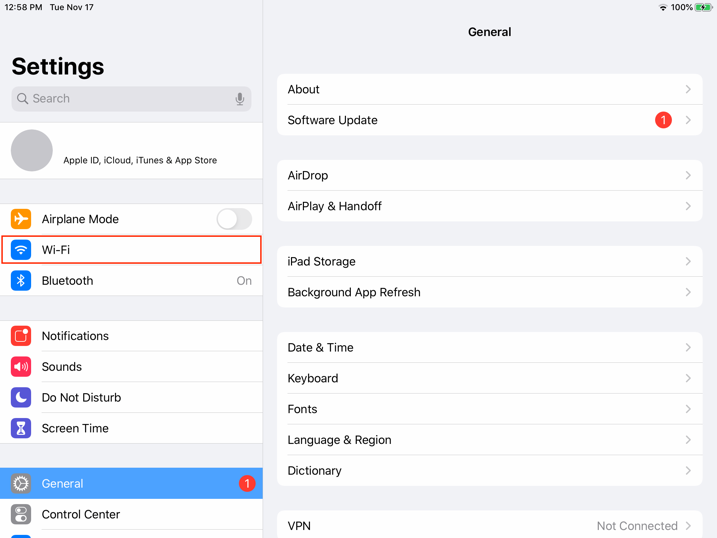
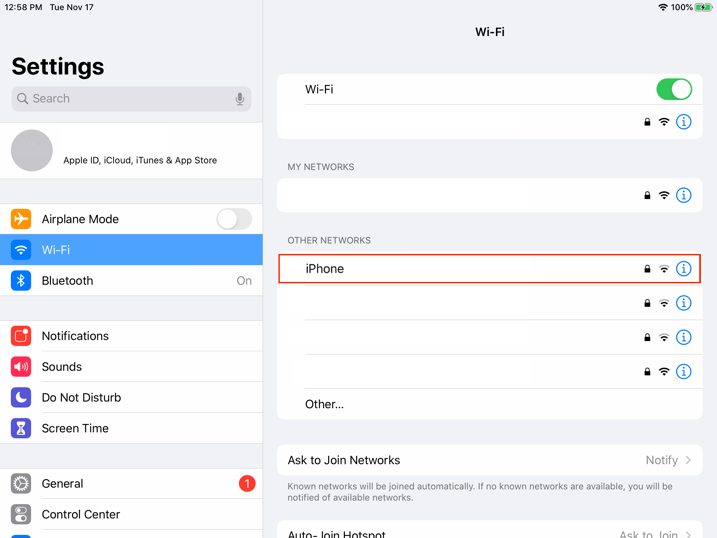
On your iPad A, go to settings, and then click on Wi-Fi.
Step 5
You will see a list of Wi-Fi connections available within your vicinity.
Click on your device network name transmitting the personal hotspot.
In this scenario, the network name is “iPhone”.
Step 6
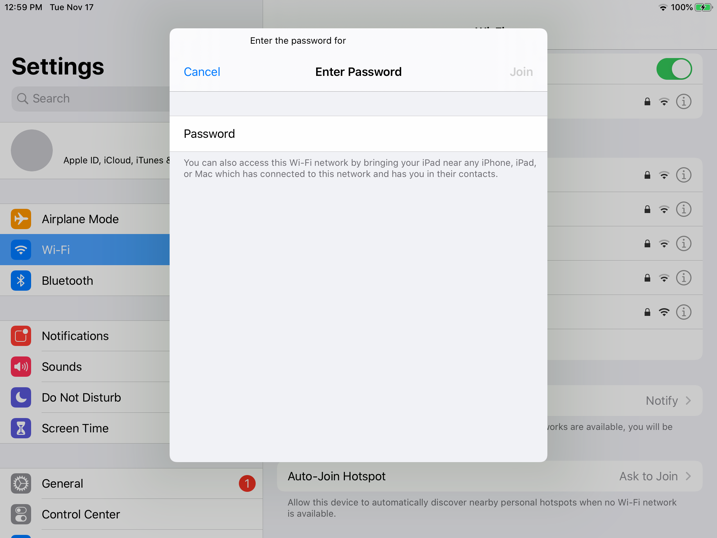
iPad A will prompt for the Wi-Fi password on your screen.
Input the Wi-Fi password acquired during Step 3.
In this scenario the Wi-Fi password is “1234567890a”.
iPad A is now connected to your personal hotspot.
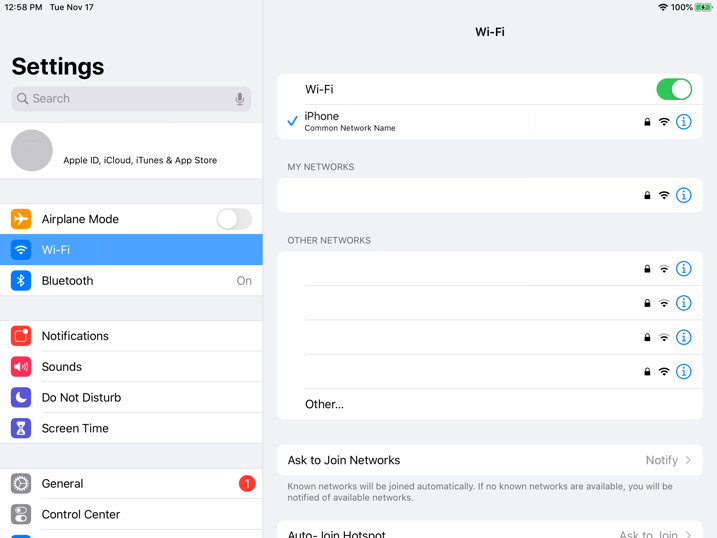
For iPad B, repeat Step 4 to Step 6 to connect to your personal hotspot transmitting from your iPhone.
Upon connecting both iPads to this device personal hotspot, do remember to update terminal IP address in Settings -> Terminal of the app as the IP address of both devices have been changed.